 Table of Contents
Add Assets
Assets dashboard is a centralized repository for storing and managing digital elements essential for web application development and customization. This includes images, logos, style sheets, scripts, and more. The purpose is to maintain consistency in design, streamline web application development, and ensure efficient updates. By providing secure access, version control, and permissions, Web Application Assets enhance collaboration, branding, and user experience across multiple web applications within the platform.
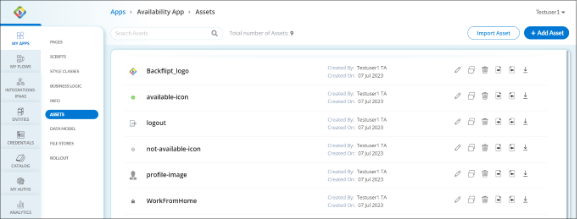
Assets Dashboard
Assets dashboard allows you to perform the following actions.
- Search Bar: To search for a particular asset.
- Import Asset: To import assets from external sources.
- Add Assets: To add asset to the assets dashboard.
- Edit
 : To edit the asset properties such as name, description, and the selection for making the asset available for Public, and to choose and upload a new module file. You can also download the current Module.
 - Copy
 : To copy and create as a new asset.
 - Delete
 : To delete the specific asset from the Assets.
 - Export
 : To download the specific asset.
 - Import
 : To override the specific asset from external sources.
To Add Assets
- Go to the required Web Application > Edit > Assets.
- In Assets, click + Add Asset.
- In the Add Asset dialog, add the following information:
- Name: Enter a name for your asset that is clear and descriptive.
- Description: Enter a brief description outlining the purpose of the asset.
- Upload File: Click on Choose File to upload an asset from your local machine. After you upload the asset, you also get an option to download the asset.
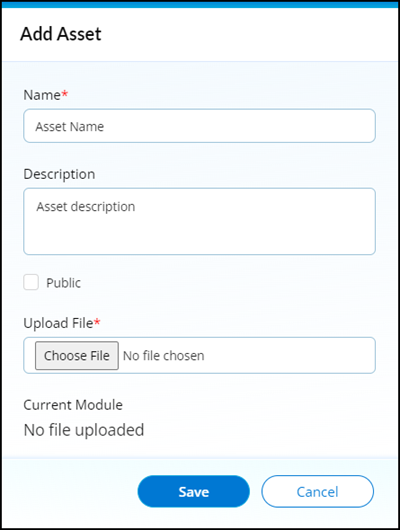
- Click Save. After the asset is saved, the Assets shows the added asset.